EditFast DR
The full guide

How to use EditFast with DaVinci Resolve

From installing to the last tool, step by step. EditFast is an app that runs beside DaVinci Resolve (free or Studio), and there are no keys to add — transcription, sound effects and b-roll run from EditFast itself the moment you sign in.

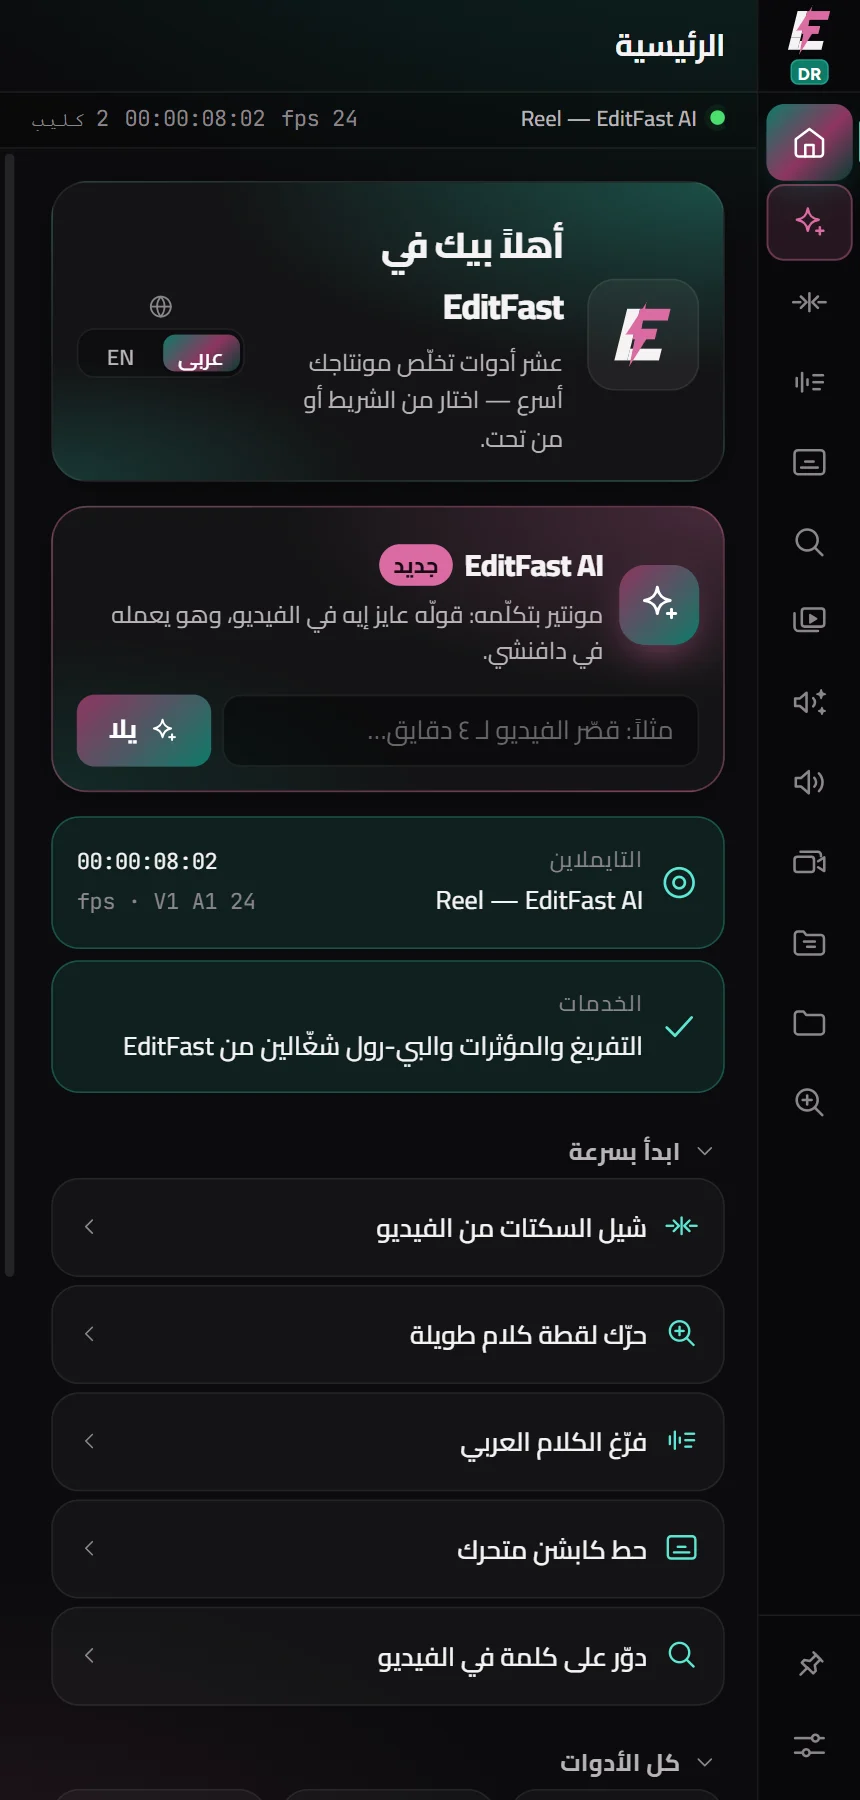
The home screen of EditFast for DaVinci Resolve

Installing, and connecting to DaVinci Resolve

  1. Download the DaVinci version from the download page, unzip it and run the installer. It puts an EditFast icon on your desktop.
  2. Open EditFast and sign in with the same email and password as the site.
  3. Open DaVinci Resolve (free or Studio, version 21 or newer) and open your project.
  4. At the top of Resolve, once: Workspace → Scripts → EditFast. EditFast says “Connected to DaVinci Resolve”, and the timeline’s name appears at the top.

The last step is once each time you open Resolve — the free Resolve 21.1 runs no plugins, so EditFast connects to it from the Scripts menu. To keep the EditFast window above Resolve, press the pin at the bottom.

VideoThe steps above, filmed

Filmed on Windows. On a Mac, the installer steps are on the download page.
EditFast AI beside DaVinci Resolve

EditFast AI

AI
  1. Open the timeline you are working on in Resolve.
  2. Type what you want in your own words — say, “cut the repeats and the pauses and add karaoke captions”, or “grade the video”.
  3. Choose how deeply it thinks at the top; your balance is beside it. For big requests, let it think deeper.
  4. Any cut shows you a plan first, for you to approve. And any script inside Resolve is shown to you before it runs.

Cuts and grades are made on a copy of the timeline, named “… — EditFast AI”, which opens for you; your own timeline stays as it was. It also tells you whether the pictures and titles on the timeline stayed in place after the cut.

Smart Cut in EditFast for DaVinci Resolve

Smart Cut

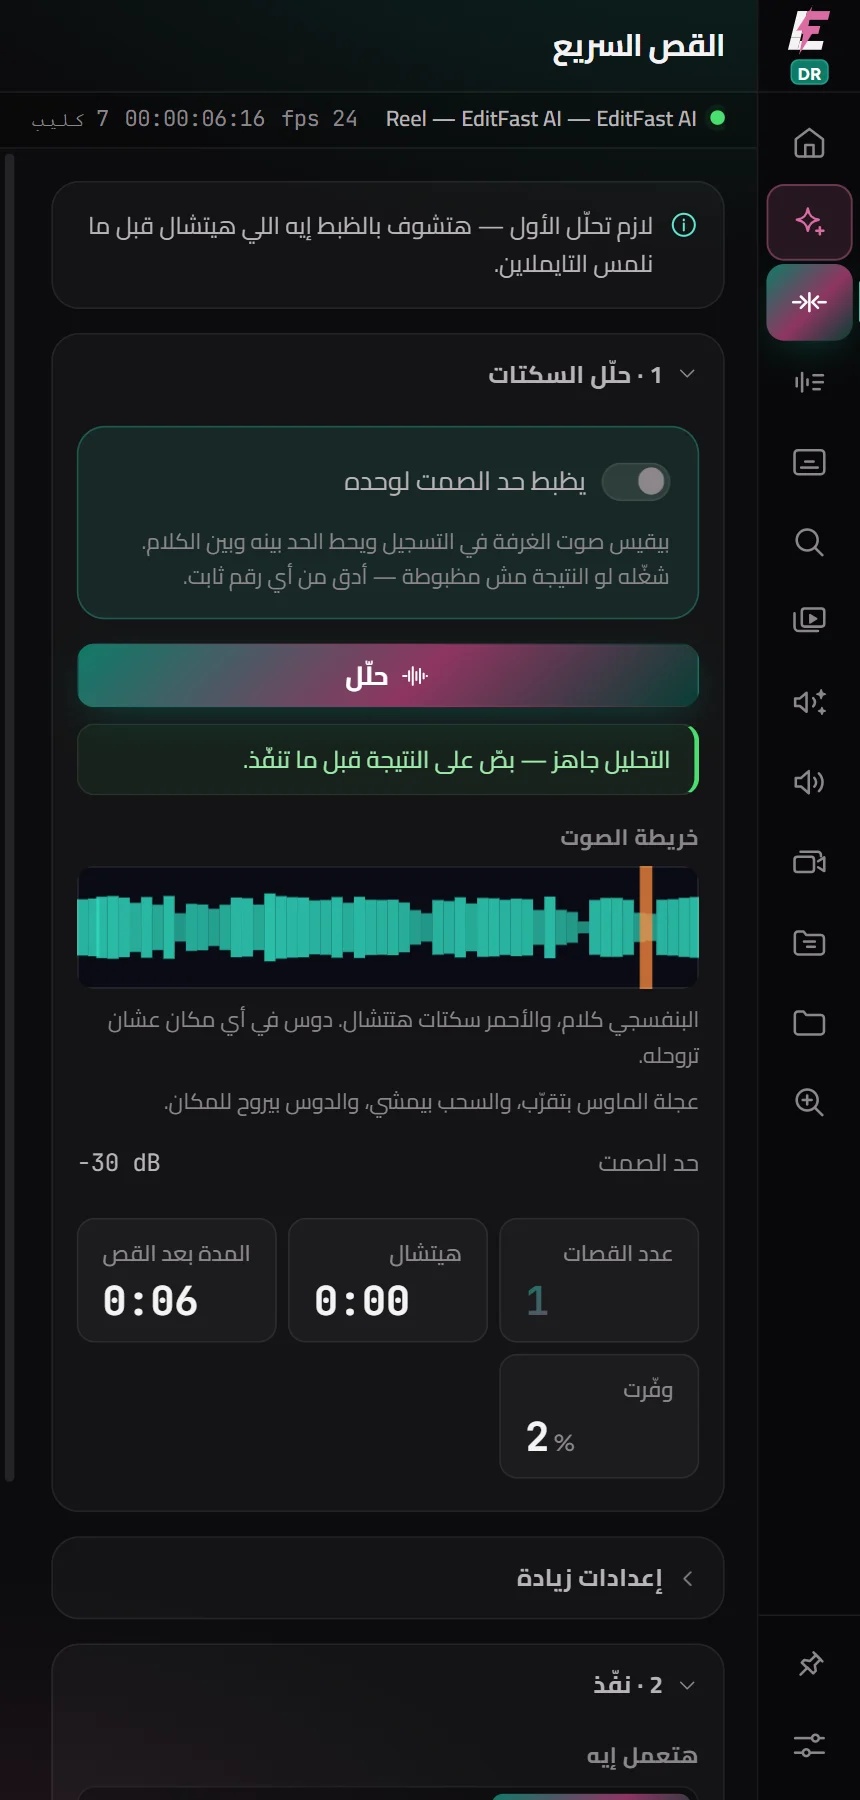
  1. Open the timeline and press Analyze — it listens to the sound and finds the silences.
  2. Adjust the settings if you like (the shortest silence to remove, and the room kept before and after speech), and look at the result.
  3. Press Remove silences — it copies the timeline, cuts the copy and opens it for you.

Picture and sound stay together and linked, and every clip keeps the zoom, audio, colour and Fusion it had.

The transcript in EditFast for DaVinci Resolve

Transcript

AI
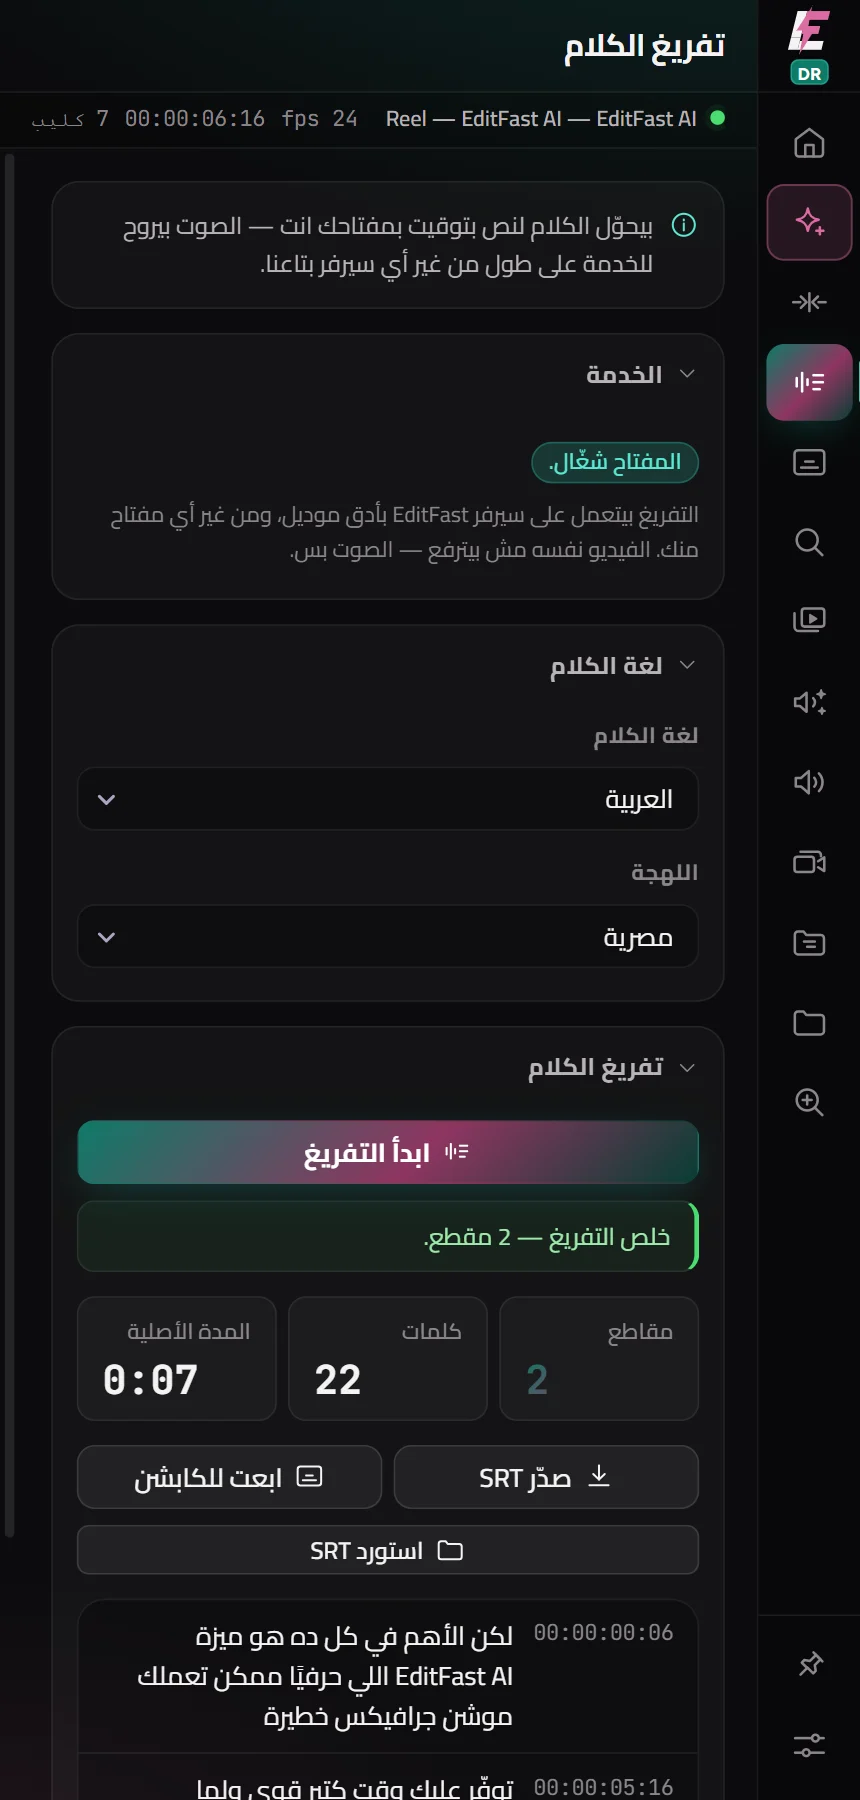
  1. Choose the language (and, for Arabic, the dialect) and press Start transcription.
  2. You get every word with its time; press any sentence to go to it on the timeline.
  3. This transcript is what the captions, cutting by the word and search all work from.
Caption looks in EditFast for DaVinci Resolve

Captions

AI
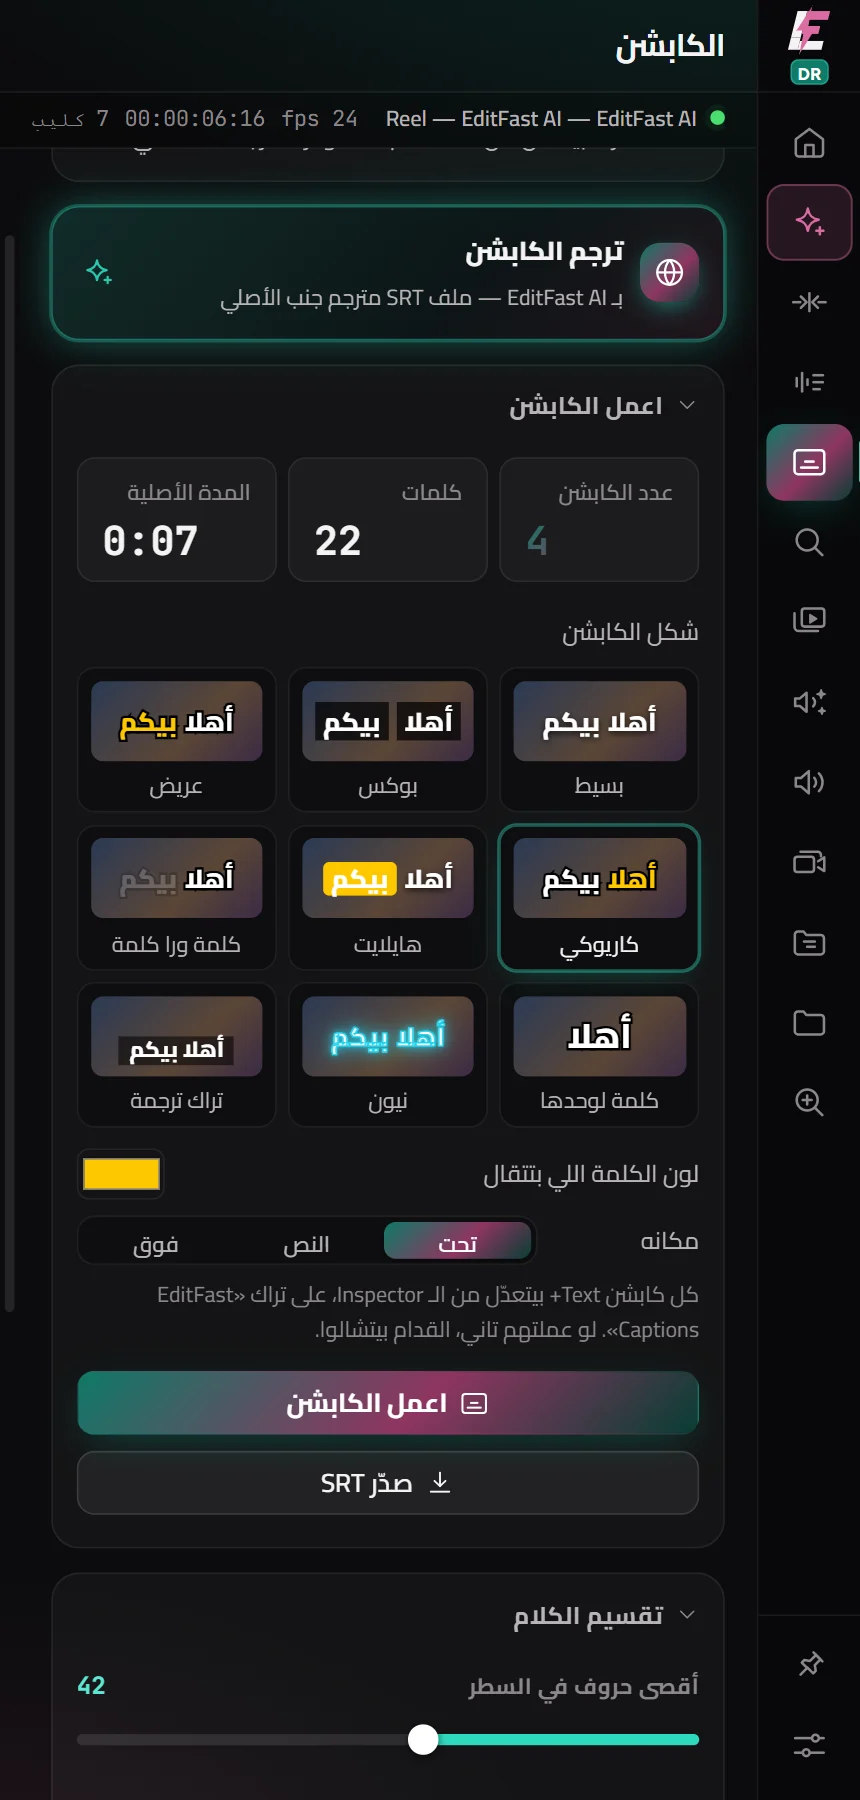
  1. After the transcript, open the Captions tool.
  2. Pick a look from the cards: simple, box, bold, karaoke, highlight, word by word, one word, neon — or a Resolve subtitle track.
  3. Choose the colour of the word being spoken, and where the captions sit (bottom, middle, top).
  4. Press Build captions — they land on a track named “EditFast Captions”.

Every caption is a Text+ whose words and font you can change in the Inspector. Build them again and the old ones are removed by themselves. And Translate the captions makes a translated SRT beside the original.

Picking a colour look from pictures

Colour

AI
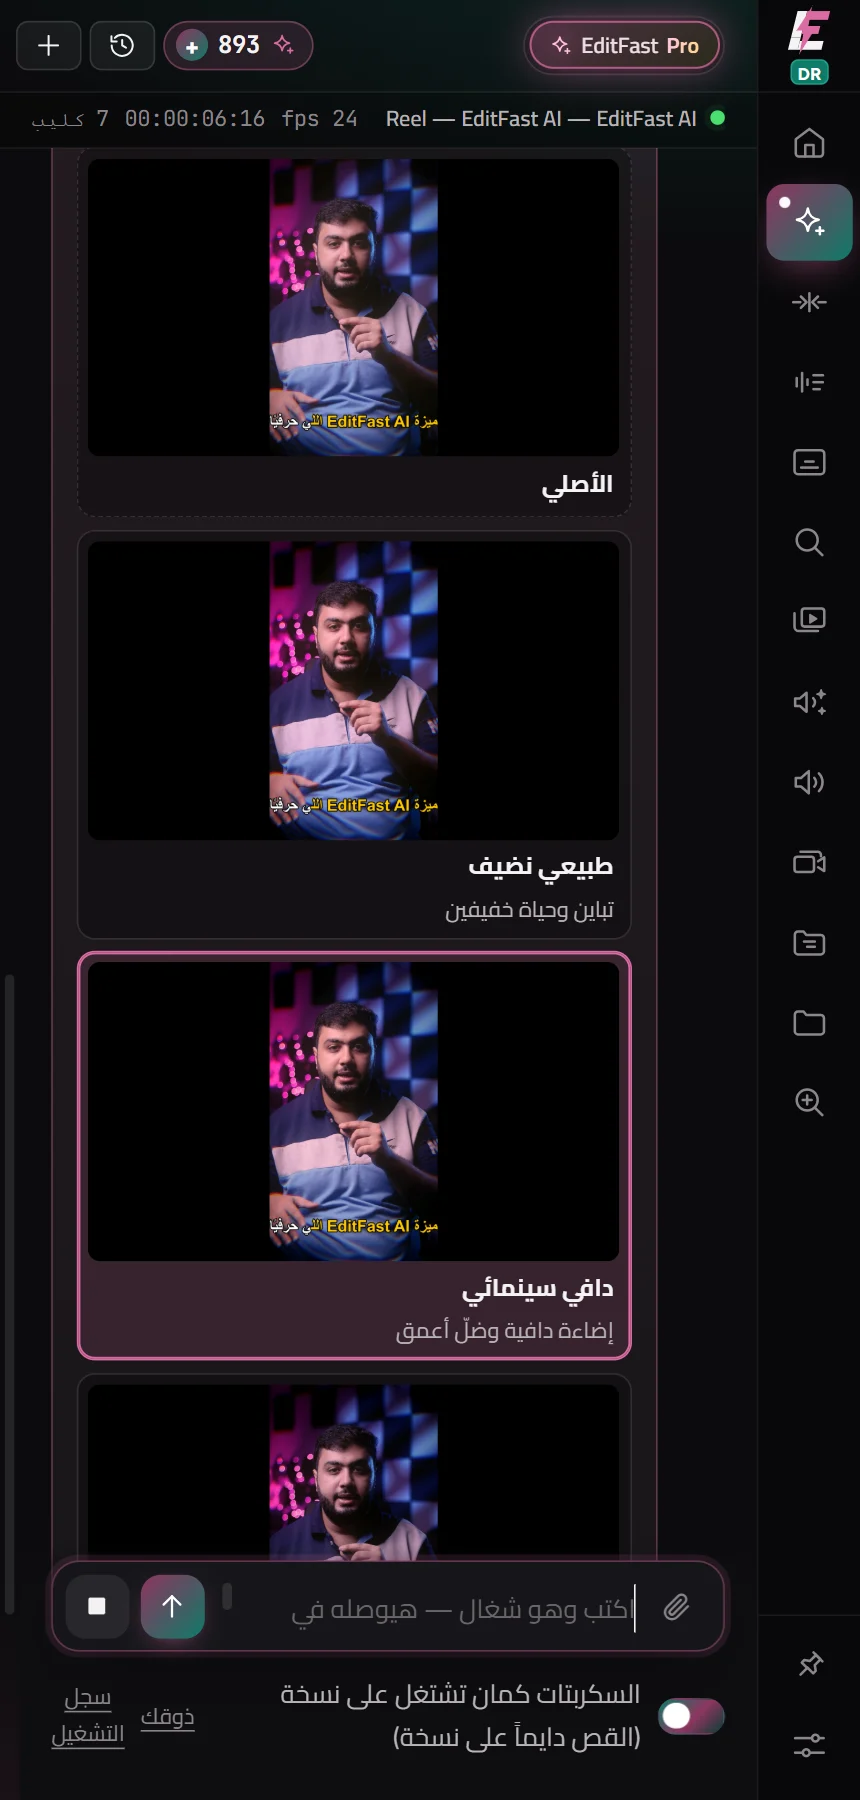
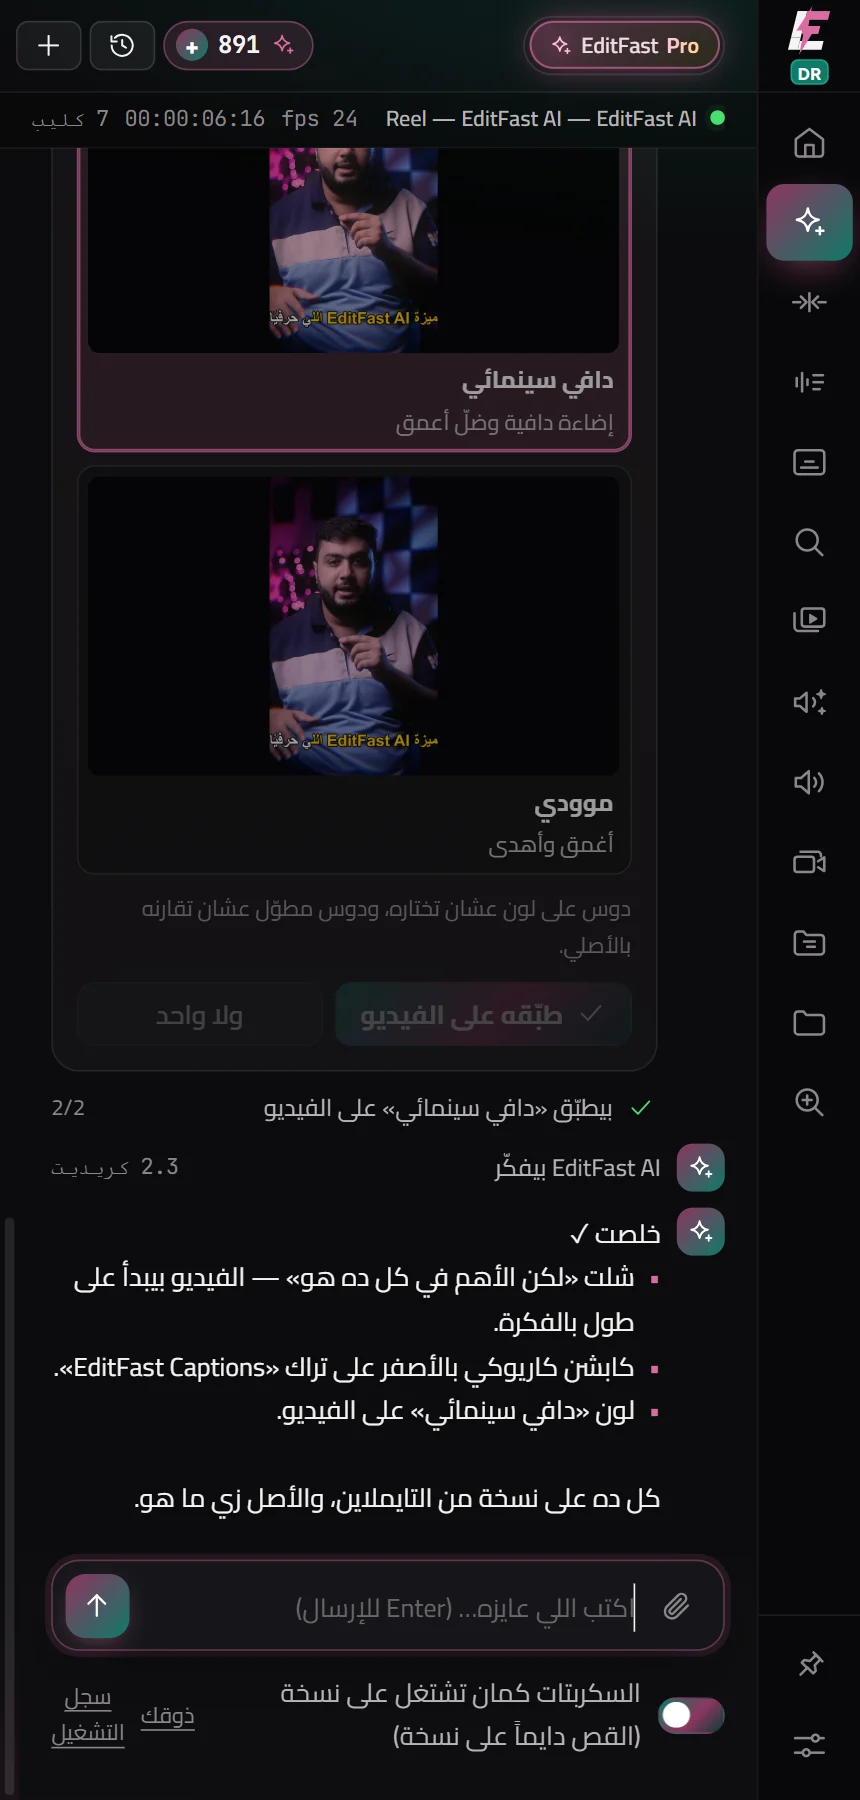
  1. In EditFast AI, type, say, “grade the video” or “make it cinematic”.
  2. It makes 3 looks for your video, Resolve renders each one, and you see them as pictures in the chat beside the frame as it is now.
  3. Press the look you like (press and hold to compare it with the original), then Apply it to the video.

The look goes on the first colour node of every clip, on a copy of the timeline — captions and graphics are never graded.

EditFast’s tools for DaVinci Resolve

More tools

  1. Search & markers: find any word in the video and jump to it, and make chapters and markers.
  2. B-roll, auto sound effects and sound effects: each lands on tracks of its own above the picture.
  3. Multicam: switches between cameras on whoever is speaking, from the microphones.
  4. Auto zoom: punch-ins on the strong words, as Fusion you can open and change.
  5. Tidy project and your library: the Media Pool sorted into bins, and your own sounds and footage close at hand.

Troubleshooting

Open Resolve and a project, then at the top Workspace → Scripts → EditFast. That step is needed once each time you open Resolve. If EditFast is not in the menu, run the installer again with Resolve closed.

Each product has its own subscription. If you subscribe to Premiere or After Effects only, you need a DaVinci subscription. If you bought it and still see this, close EditFast, open it and sign in again.

Voice isolation, Magic Mask and Smart Reframe are features of DaVinci Resolve Studio itself. Everything EditFast does works in the free version.

That is the usual warning for an app that is not signed yet. On Windows: More info → Run anyway. On the Mac: run the installer from Terminal, as the download page shows under “Trouble installing?”.

Something still not clear?

Get in touch and we will answer.

Ask us