EditFast Ae
The full guide

How to use EditFast in After Effects

From installing to the last tool, step by step. And no keys to add — transcription, sound effects and b-roll run from EditFast itself the moment you sign in.

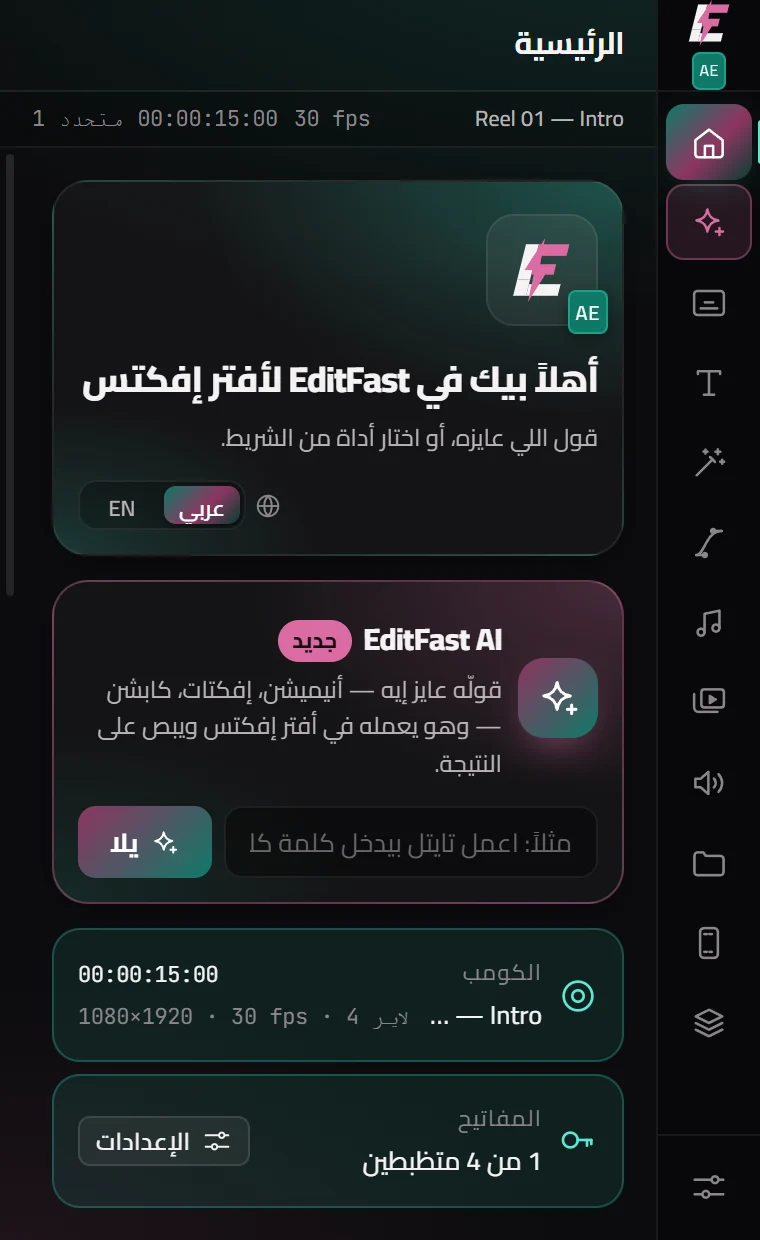
The home screen of EditFast for After Effects

Installing, and the first time

  1. Download the After Effects version from the download page, unzip it and run the installer.
  2. Open After Effects (2024 or newer), and at the top: Window → Extensions → EditFast AE.
  3. Sign in with the same email and password as the site. If Premiere is on the same computer, the subscription counts the computer once.
  4. Drag the panel beside the Composition so it stays in front of you while you work.

No need to turn on “Allow Scripts to Write Files” in After Effects’ settings — the panel works without it.
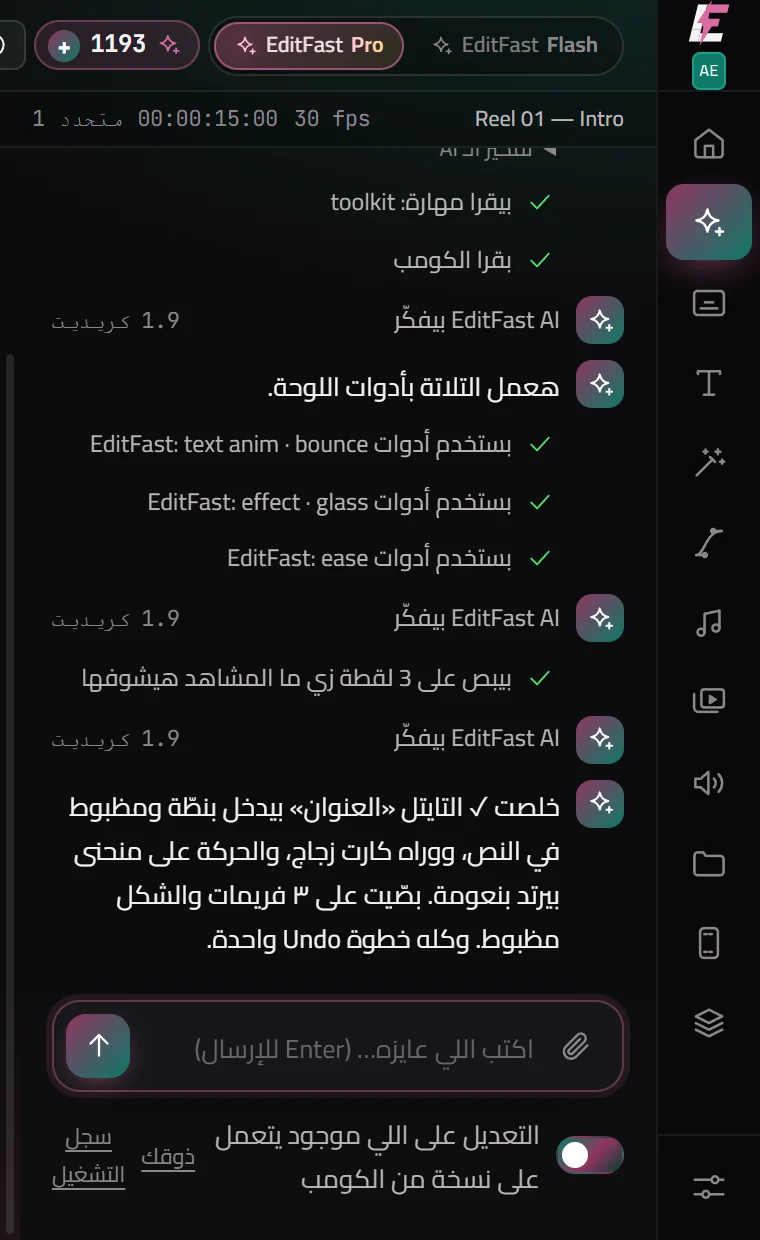
EditFast AI inside After Effects

EditFast AI

AI
  1. Open the comp you are working on, and select the layer if the request is about it.
  2. Type what you want in your own words — say, “make this title bounce in, and put glass behind it”.
  3. Choose Flash for simple requests and Pro for big ones; your balance is beside them.
  4. It reads the comp, works with the panel’s tools, looks at frames of the result and fixes them. If it is going to run a script, it shows it to you first.

Everything it does is one undo step — Ctrl+Z takes all of it back. To have it work on a copy of the comp, turn on the switch under the chat.

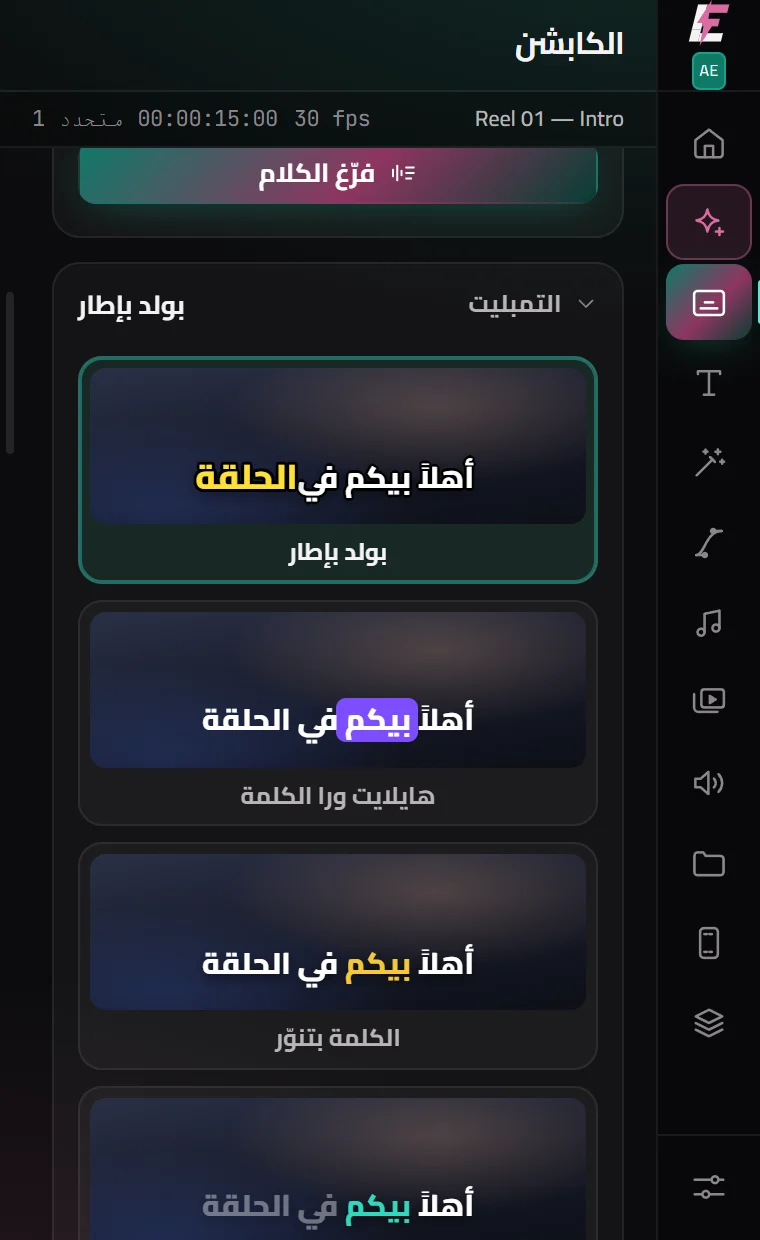
The captions panel

Captions

AI
  1. Select the layer with the speech, choose the language, and press Transcribe.
  2. Hover over any template to see it move with your words, and pick one of the 16.
  3. Change the colour, frame and size from the panel, or later from the Captions Controls null in the comp — it changes every caption at once.
  4. Want the commas and full stops gone? Press Remove punctuation, or have it done automatically.

Every line is a real text layer, in the right direction for its language — edit a word in it like any text. And you can export an SRT.

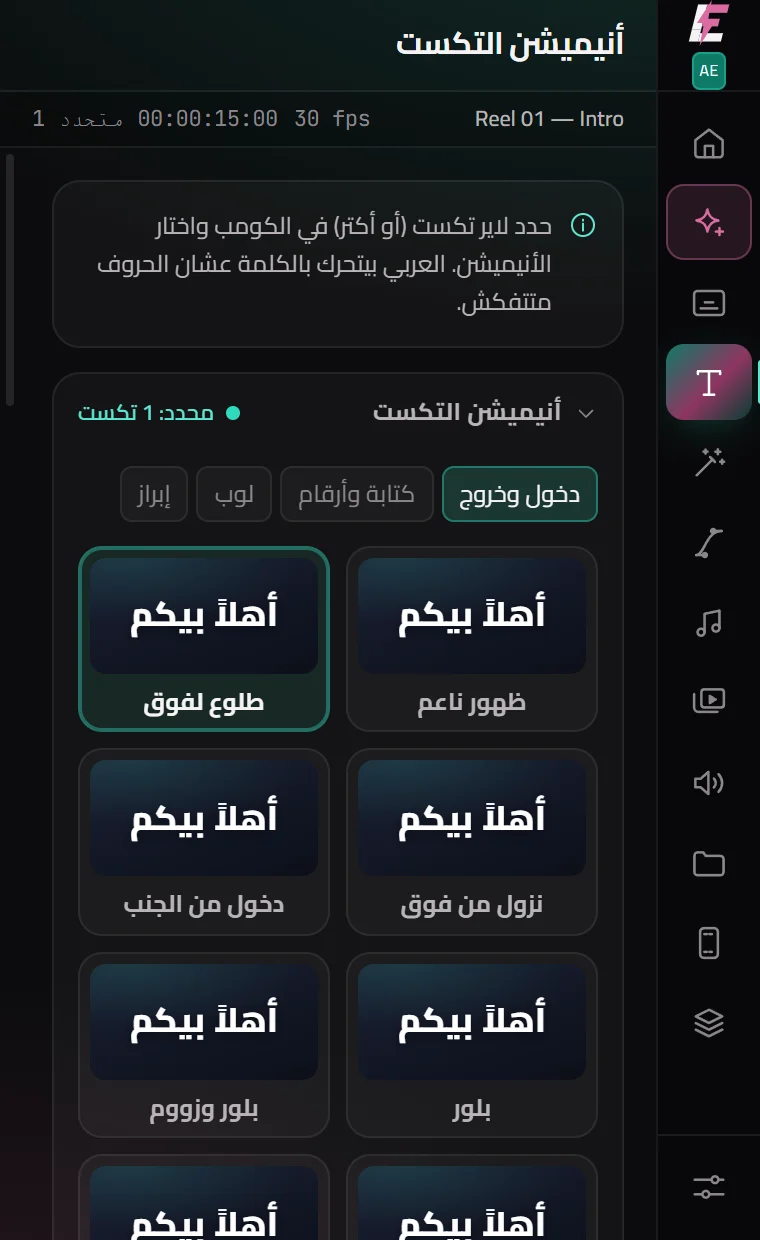
The text animation panel

Text animation

  1. Select a text layer (or more) in the comp.
  2. Choose the tab: In & out, Typing & numbers, Loop or Emphasis.
  3. Hover over a card to see the motion on your words, and press it to apply.
  4. In the settings: by word or by line, the length, the gap between words, and the order.

Arabic moves by the word so its letters stay joined. All the motion sits on the “EF Text” sliders in Effect Controls, to change later.

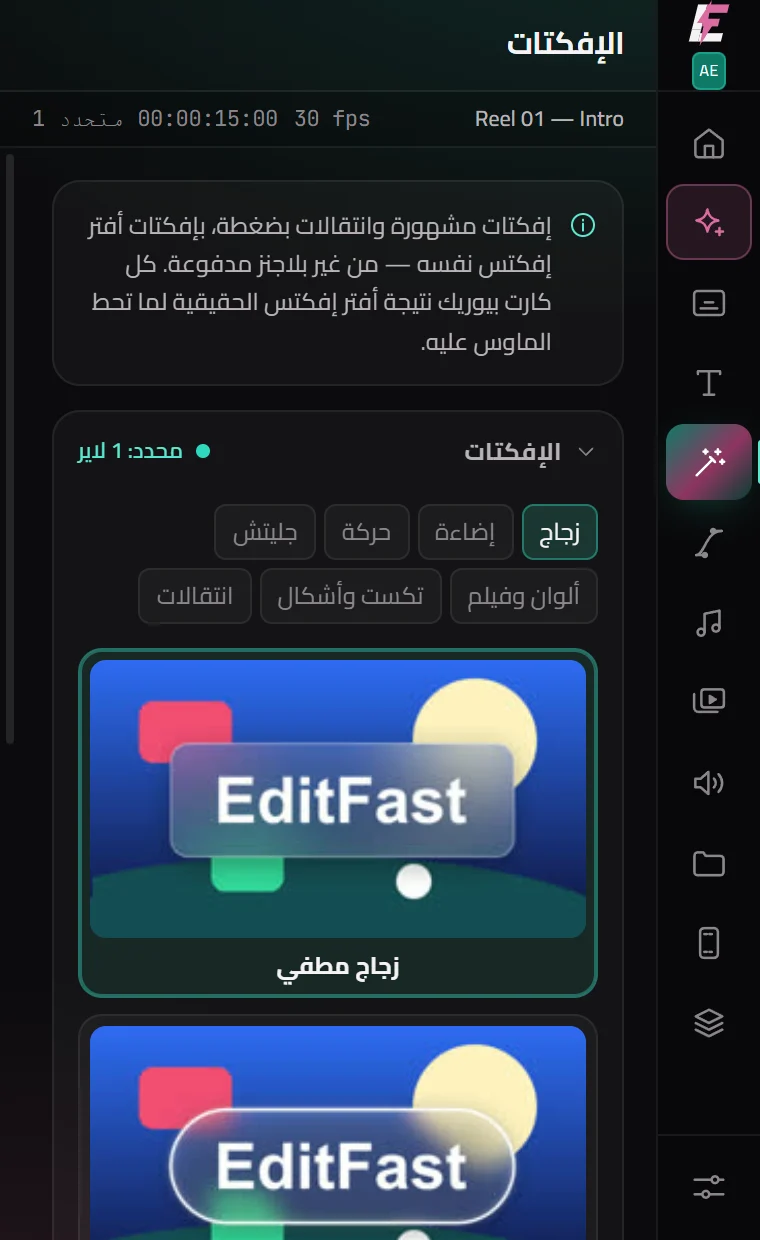
The effects panel

Effects and transitions

  1. Select the layer for the effect — or select nothing and it goes on an adjustment layer for the whole comp.
  2. Hover over a card to see After Effects draw it, and press to apply.
  3. Glass and liquid glass build real layers and a control null with the width, height and blur.
  4. Transitions go at the playhead — right on the cut — and you set their length from the panel.

Every effect is built from After Effects’ own effects — the project opens on any computer, with no other plugins.

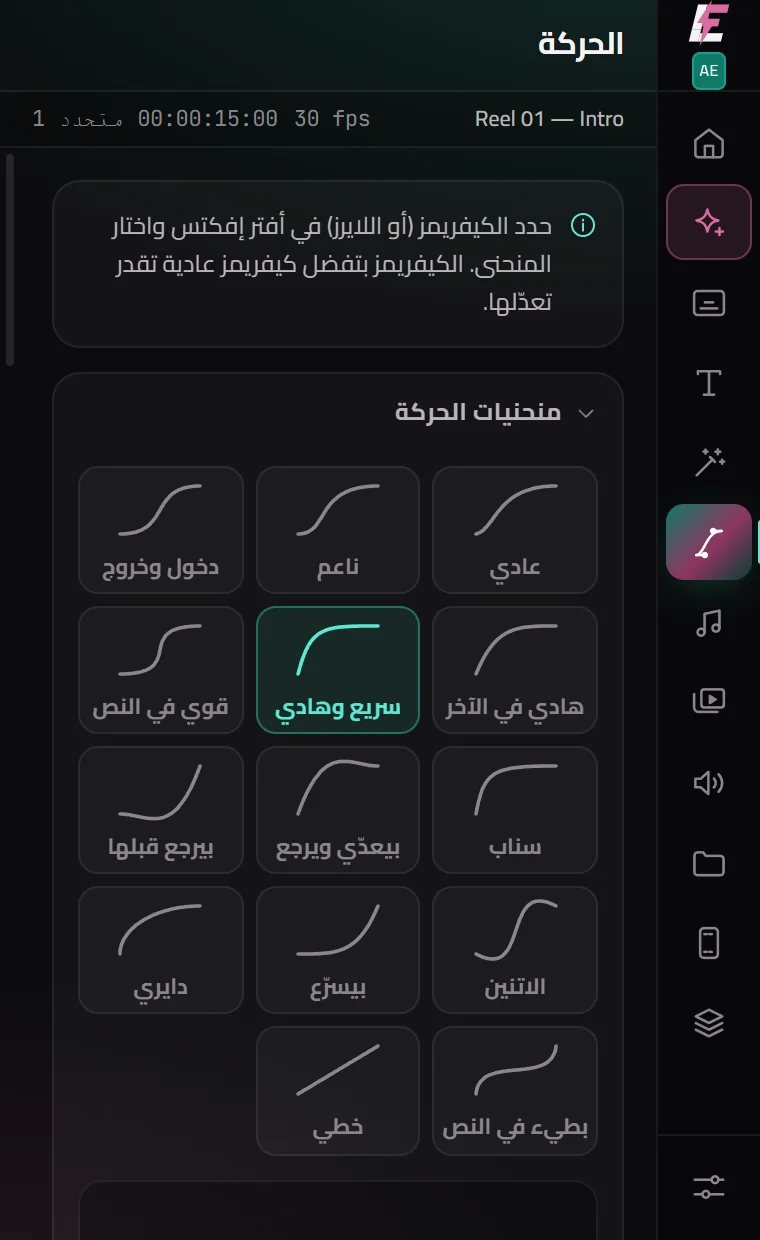
The curve editor

Motion

  1. Select the keyframes (or the whole layer) and pick one of the 14 curves — or drag the handles in the editor.
  2. Anchor point: press any of the nine points and the layer stays where it is.
  3. Align and distribute, a control null for the selection, stagger, fades, split at the playhead, and pre-compose.
  4. And ready expressions: wiggle, loop, bounce, inertia and more, in one press.
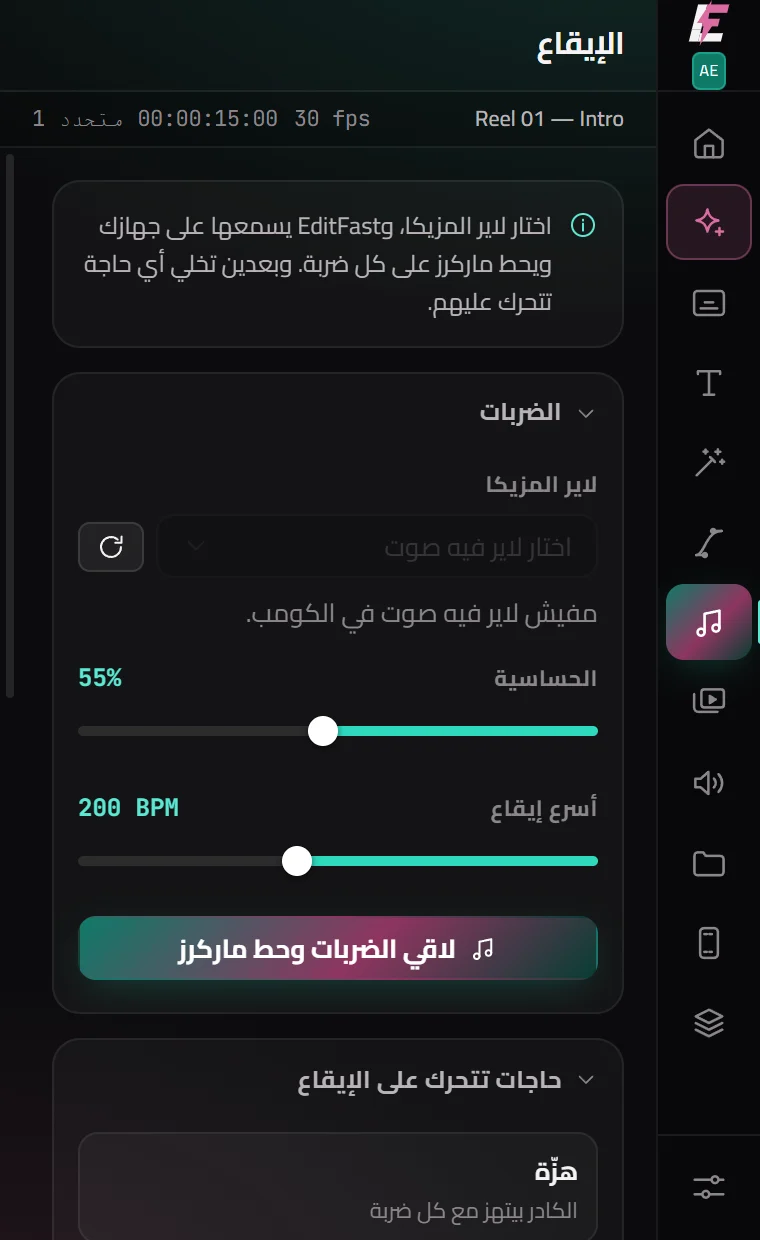
The beat panel

On the beat

  1. Select the music layer and press Find the beats and add markers — the analysis runs on your computer.
  2. Adjust the sensitivity if there are too many or too few markers.
  3. Choose what happens on each beat: a shake, a zoom, a flash, a glow, RGB — or cut your pictures to the beat.
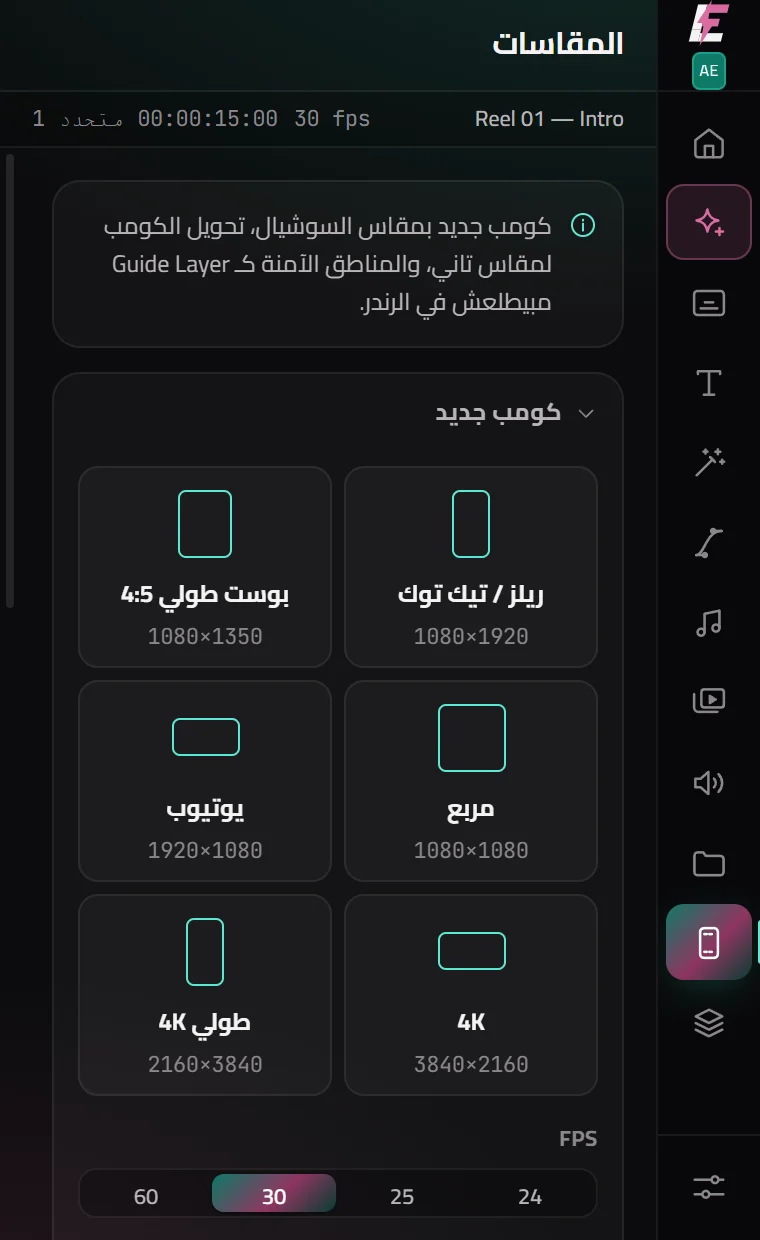
The sizes panel

Social sizes

  1. A new comp sized for Reels, TikTok, YouTube or a post, at the frame rate you choose.
  2. Turn any comp vertical: the video fills the screen, or sits in the middle over a blurred copy of itself.
  3. The safe zones for TikTok, Reels and Shorts go in as a guide layer — you see them while you work, and they never render.
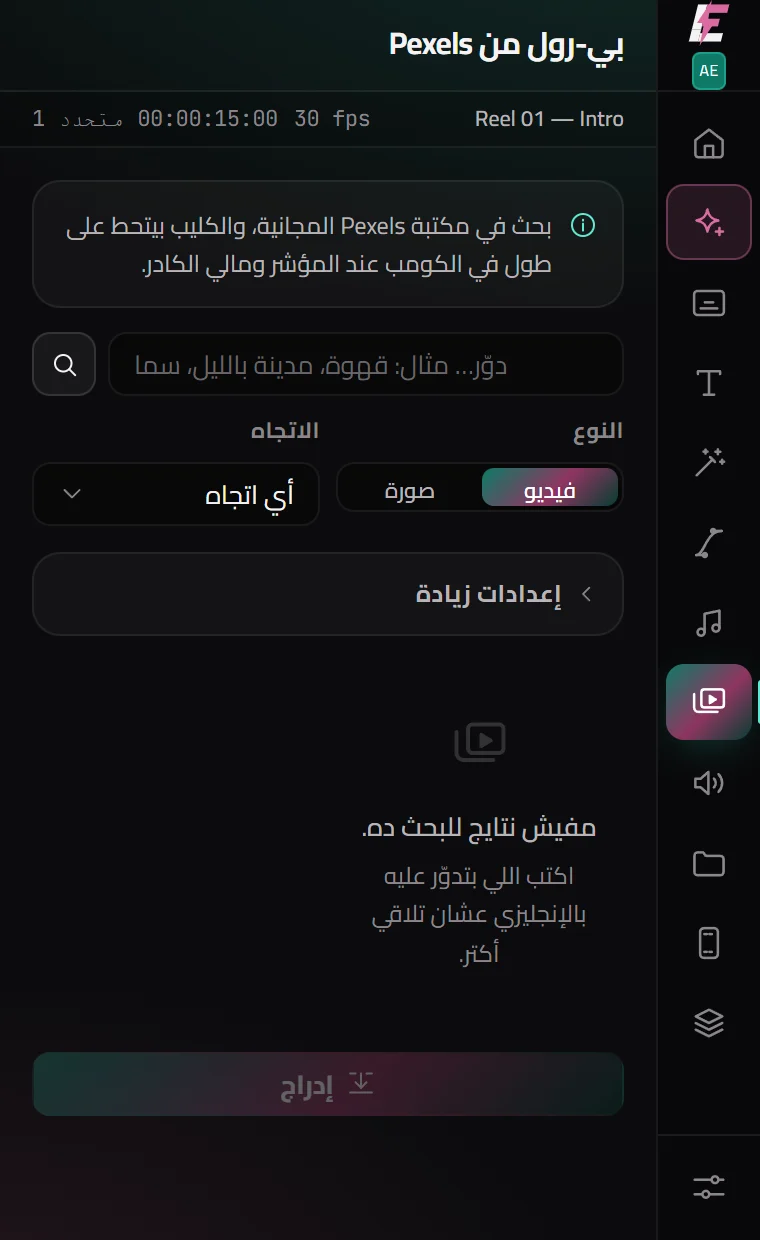
The B-roll panel

B-roll, sound effects and your library

  1. Search for a shot or a picture and press Insert — it lands in the comp at the playhead, sized to fit.
  2. Sound effects: describe the sound and it is generated and placed at the playhead.
  3. Your library: your own folders, shared with the Premiere panel.
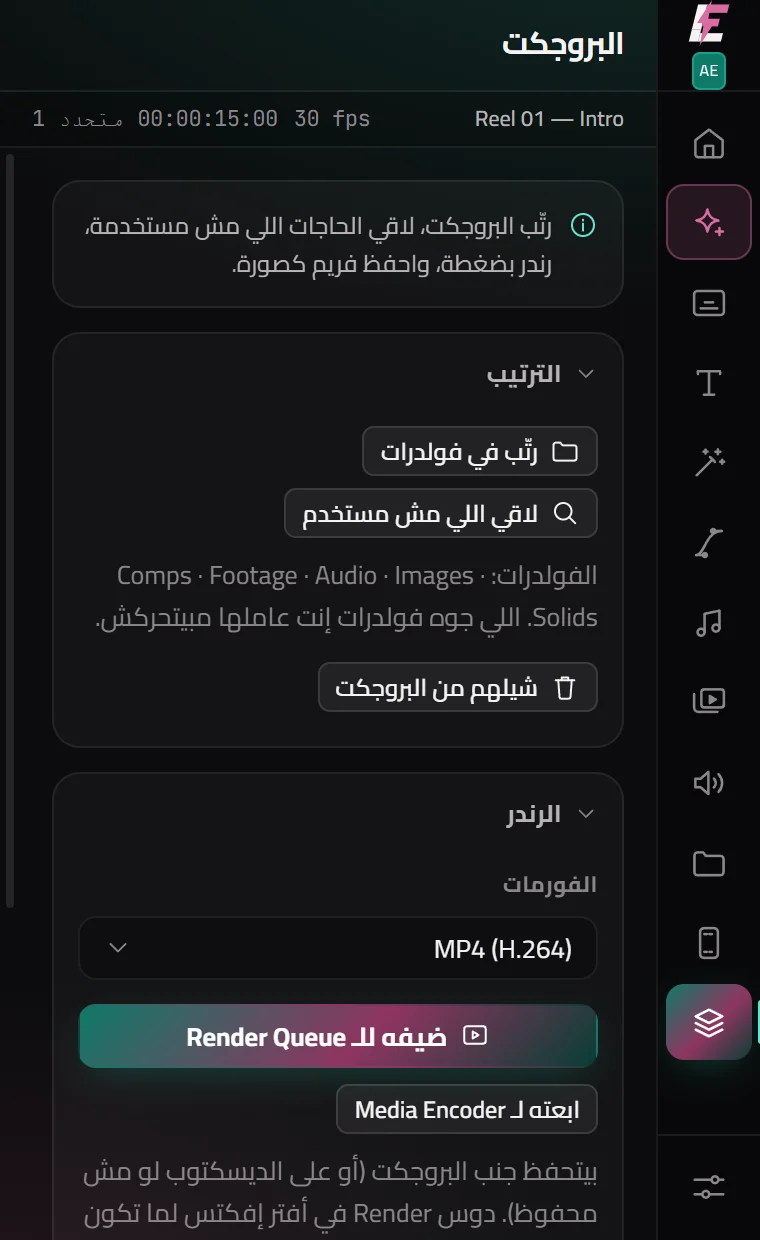
The project panel

Project and render

  1. Sort into folders: Comps, Footage, Audio, Images and Solids — and what is already in your own folders stays put.
  2. Find what is unused: it shows you, and deletes nothing until you say so.
  3. Render an MP4 or high quality in one press, or send it to Media Encoder, and save the frame in front of you as a PNG.

Troubleshooting

Make sure After Effects is 2024 or newer, that you ran the installer with After Effects closed, and then open After Effects again. If it is still missing, run the installer again and get in touch.

Each plugin has its own subscription. If you subscribe to Premiere only, you need an After Effects subscription or the full bundle. If you bought it and still see this, close the panel, open it and sign in again.

That happens when the text was made by hand with the old text engine. What the panel makes is set right on its own. For an older layer, select it and press Fix Arabic direction under “Text tools” in the text animation tool.

That is After Effects’ own message after it was force-closed last time. Choose Continue — not Safe Mode — and carry on.

Something still not clear?

Get in touch and we will answer.

Ask us